Melbourne on the rails – with FREE RAW files

If you wanna jump to the free raw files, feel free!
My brief history of RAW photography
When I was getting more interested in digital photography, I kept on hearing “shoot RAW, shoot RAW”. I didn’t really understand why you need RAW files, or what benefits that gave. Not only, I used to shoot JPEG because RAW files were so big, and I’d think “if I wanna shoot something decent, I’ll shoot RAW, even if I don’t really know why”. Inevitably, I forgot, and yep, I’ve got a bunch of old JPEGs I can’t do too much with from a technical standpoint (or at least, a limited amount). It actually pisses me off, still!
Why the free RAW photos
Heads up; Each RAW file is about 20Mb, so don’t download them on your mobile.
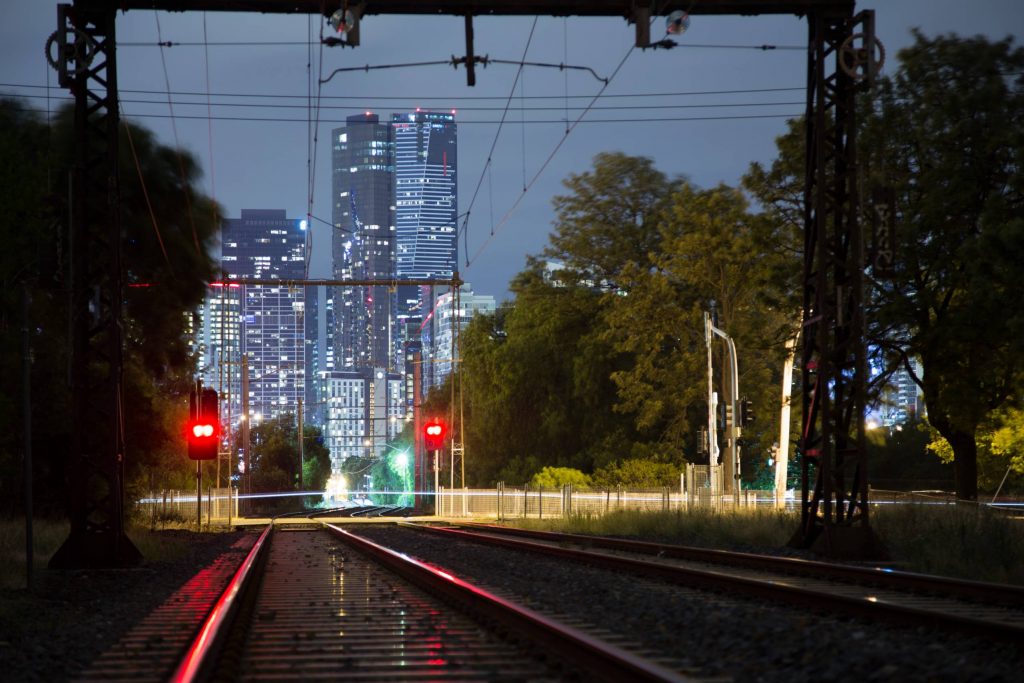
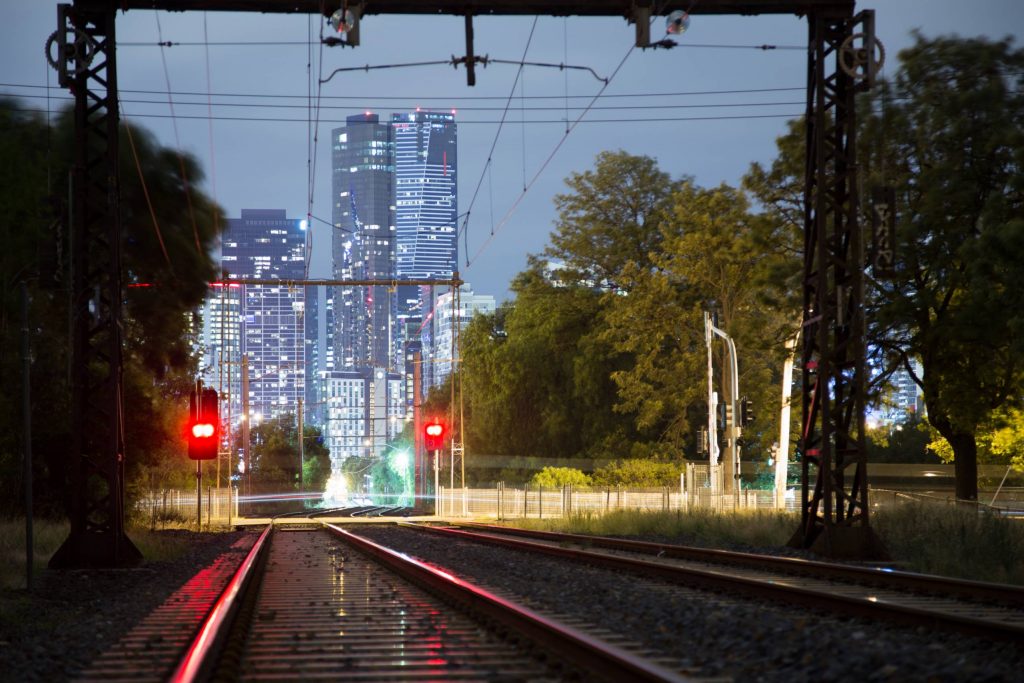
So, on the back of my history of not knowing what I was doing, and the fact I feel moderately competent now, I’m giving away 3 DNG RAW files as a bit of a starter. Something to play with, something to do what you want with, if you’re interested, and want to experiment. Of the files, I’ve got one under exposed RAW file, one over exposed raw file, and one correctly exposed raw file (according to my aperture priority settings). These are the kind of files you need to make a HDR image (some explanation below), if you want, or you can just grab the picture that you think will best suit your play-time.
What tools to use for RAW files?
Firstly, RAW files are like the negative of the digital camera, and not your normal JPEG or GIF that you’d see on the web. They are loaded with meta data that gives information on how to display the image, what gear – like lens, f-stop, etc, was used to shoot it, where it was shot (if possible), and more. Also things like white balance. If you shoot JPEG, your white balance is locked in to the file, and you’re going to struggle to fix it up, if it’s not quite right. BTW, white balance is the colour temperature, and while it’s all rather complex, don’t stress now. Look it up if you’re curious. But, needless to say, RAW files give you flexibility, but you need a tool to open them up. Equally cool with RAW files is the ability to manipulate shadows, highlights, and generally, get more from dark or over exposed shots. There’s so much data in the blacks and whites, you can often save a photo that you might think too dark or bright.
The actual tools
Warning; you’re going to need a Mac or PC for this, and to take out a trial.
I’ve only got strong experience with Apple and Adobe. I’m a former Apple Aperture (trial available) user who’s switched to Adobe Lightroom (trial available), and I’ve got no thoughts on going back. Even further back, I was using Apple iPhoto, which is also very good, and free if you’ve got a Mac.
With any of these tools, I’d suggest you just download the RAW files, load them in, and play away with the sliders. Drag up and down the exposure sliders – see how far you can push it, to the point of getting noise, or going black. Play with the highlights and shadows sliders. You can tell the program to only manipulate the white areas, or the black areas. For example, you’ve got an image that’s pretty spot on, but these a sunset which is just too white. Drag down the highlights, and you might be able to save an image.
What’s HDR?
HDR is the process of mixing a few images (in most cases) of varying exposures to really make the most of the available light. Sometimes, one photo has some area that’s just too bright or dark. If your out shooting, and you can see this at the time, taking a few photos of under, over and correct exposure, allows you can do more in post production. Tools I’ve used, and would suggest as a starters are NIK Software by Google, which includes HDR Efex Pro, as well as Photomatix. In any case, download the trials, and have a play with the RAW files I’ve supplied (or your own).
What about the sad sacks on a mobile
Fear not, mobiles have some real serious options. But you’re not going to get the same high-end results, at least for the next couple years. On mobile, you are really going struggle with RAW images (it’s possible, but right now, it sucks), and you’re going to have live with JPEGs. Don’t stress, though. I’m increasingly doing mobile edits, and I’m constantly surprised with the results. Personally, I’m using Snapseed (for Android, and iPhone/iOS), and often with a final touch in VSCOCam (Android and iPhone/iOS).
Snapseed does some neat HDR stuff, from a single JPEG, and it’s pretty cool. In fact, download one of the pics below (or tap here for a hi res JPEG) and have a play for some mobile edit joy… If you do, let me know!
Last thing about HDR
There’s a tonne of haters on HDR. Personally, I don’t like the photos that are too-far-pushed. That’s totally subjective, but just do whatever makes you happy.
All the links from above
- Full Res of “Melbourne on the rails” for wallpaper/print
- Under exposed RAW file
- Over exposed RAW file
- Correctly exposed RAW file
- Adobe Lightroom
- Aperture Trial
- Photomatix
- HDR Efex Pro
- Snapseed (for Android, and iPhone/iOS)
- VSCOCam (Android and iPhone/iOS)
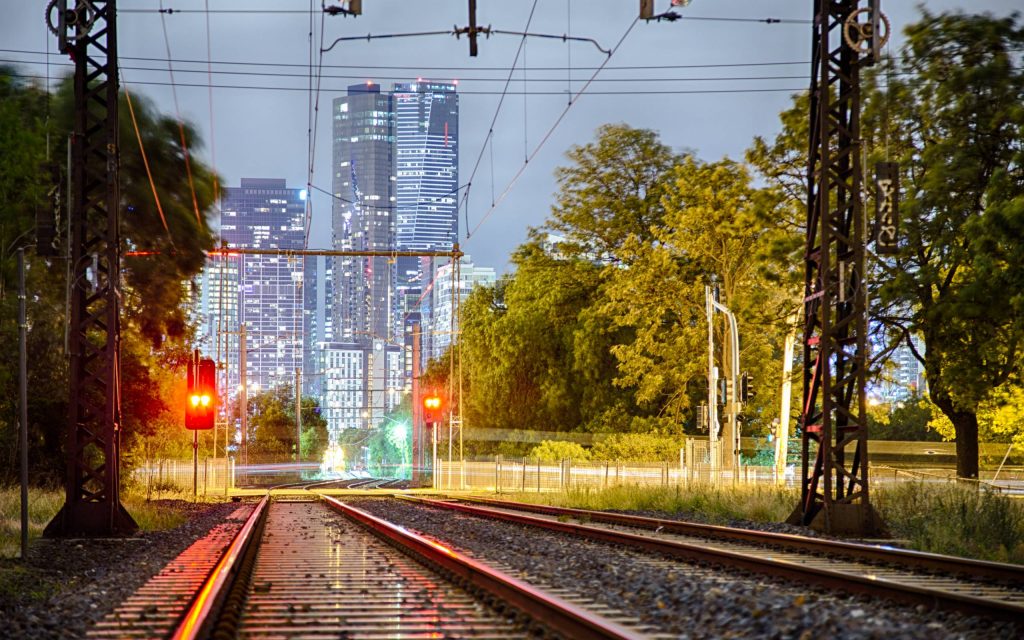
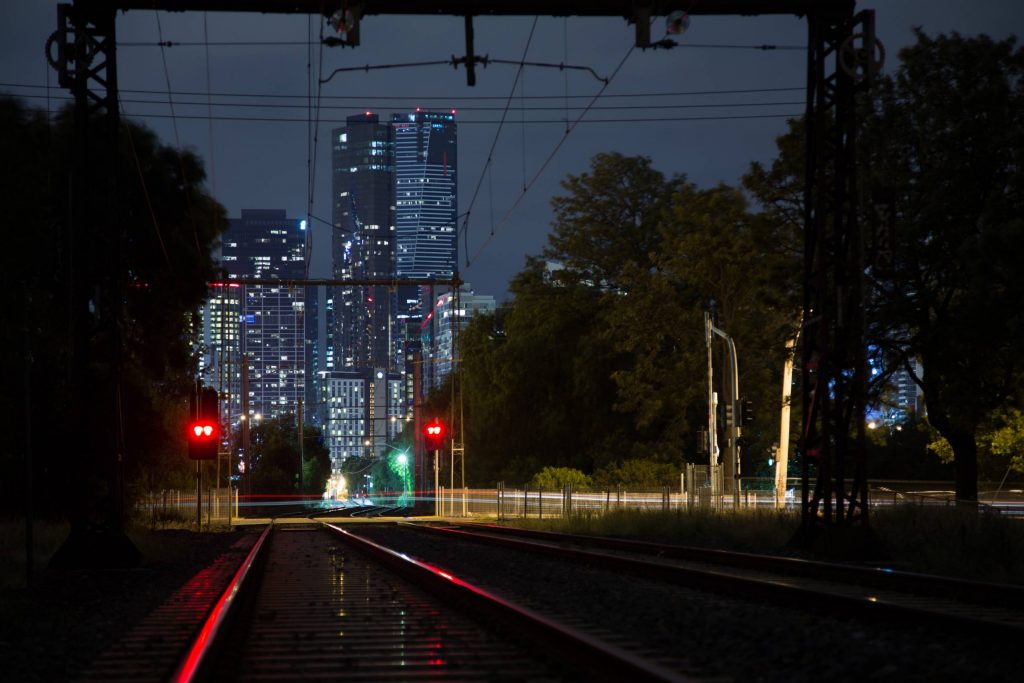
What did I do with my shot?
This first shot below is the result of the bottom three photos. Those bottom three photos are pretty much ‘straight out of camera’ (but made JPEGs for the web). You can download the RAW files and, depending on how you go with your own process, come up with something similar to what I’ve done. That’s not to say you should, but this was my idea.
I’ll give you a high level overview, but not the exact process. Try have a play, yourself. But basically, I modified the white balance of all three files in Lightroom. I wanted more blue. then I did some minor tweaks to highlights and shadows, and applied some lens corrections. From there, I decided to export it for HDR work in HDR Efex Pro. It’s pretty simple, and very easy to go overboard. That doesn’t matter, just play around. When I was happy enough, I saved the output file and got it back to Lightroom for some final touches. Here, I increased the contrast, toggled the clarity and vibrance, and buggered around with the saturation for longer than I should. But, that’s basically it.
Last note
Much of what I’ve stated above wont make sense until you start playing with the tools. This isn’t a tutorial, but if you really wanna have a crack, feel free to ask me in the comments below. Google tutorials, find your own way. The way I have approached photography is really by touch and break. It’s not for everyone, but that’s just my two cents.
And if you like this kind of post / give away, please give me a little share / thumbs up / comment below. Whatever way works for you 🙂